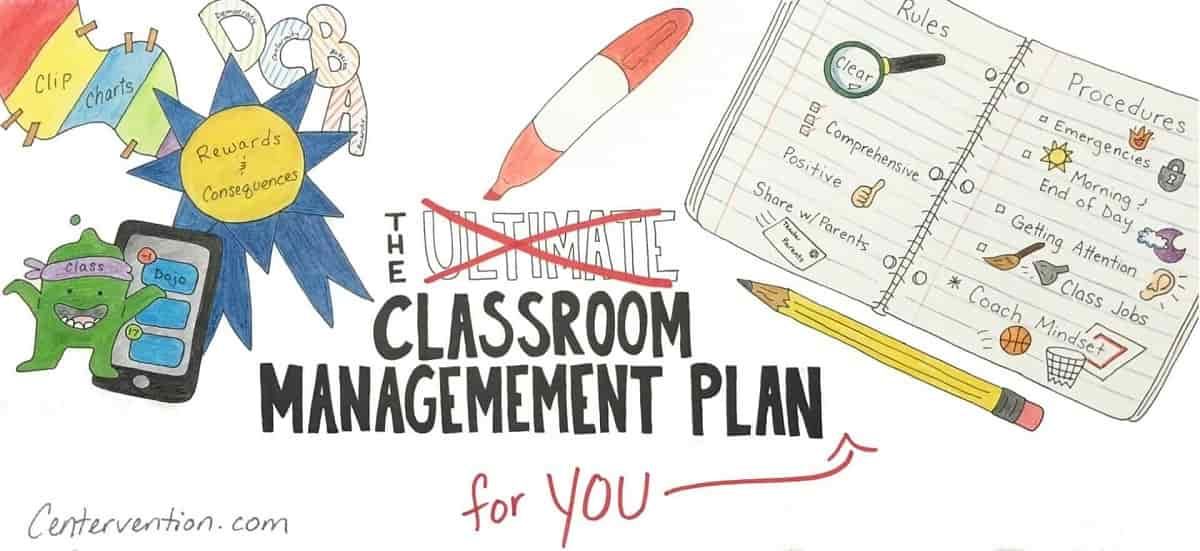
Teaching can be tough job, especially if you have ongoing behavior issues with young learners. If you’re a new teacher, switching grade levels, or realizing that your current classroom management plan isn’t cutting it, you may feel overwhelmed. Sure, it’s fun to browse Pinterest, teacher blogs, and educational websites to get ideas, but filtering and assembling those ideas into a classroom management plan is a lot of work.
So instead of starting from scratch, implement our plan as a framework and tailor it to your needs. You can pick and choose what you believe will work best for you, and as you find other ideas you like, just mix them in.
This classroom management plan is a step-by-step guide and includes proven strategies and tips for elementary school teachers, and it covers four key components for establishing a successful, well-managed classroom:

Classroom Organization and Set-Up
Read this before you hit the Target dollar bins or spend hours laminating everything in sight. In this section, we discuss the layout and organizational systems of your classroom. This will lay the foundation of your management plan, so take the time to think about how these ideas could fit in your four walls. Read more…

Classroom Rules and Procedures
Classroom rules and procedures may seem interchangeable, but they are actually two different components of your management plan. You’ll want as few rules as possible, and procedures in place that leave your students no room to fail your expectations. We give you tips on both in this section. Read more…

Classroom Management Strategies Using Rewards and Consequences
There are several different reward and consequence systems out there, and multiple arguments for which is best. No system is right or wrong – the best system motivates your particular students. We focus on positive behavior reinforcement, and you can use any of these suggestions in conjunction with school-wide frameworks such as Positive Behavioral Interventions and Supports (PBIS). Read more…
Effective Classroom Management Throughout the Year
When your students are at home, in another part of the school, or moving to the next grade level, they won’t have your rules and procedures to tell them how to act. We’ll provide you with social skills activities to strengthen your students’ ability to think critically about their behavior. Read more…
In this plan, we make a lot of references to the first few weeks of school, but if you’re reading this after the start of the school year, or even in the second semester, it’s not too late.
If you try something for a while, and it just doesn’t work for your students, that’s okay, too. Consistency is good, so don’t change your entire management system once a month; however, it’s better to introduce something new than to spend the rest of the year with a chaotic classroom. And if things go sideway, just take a step back, reevaluate, and take some time for self care!
Classroom Organization and Set-up
You may feel a lot of pressure to make your classroom look attractive and colorful. If you’re just starting out, or crafts aren’t your forte, this could seem daunting. Effective classroom organization and set-up is functional first with the cute factor second. But we’ve got you covered on both!
Before you can instruct students on procedures, routines, and expectations, you need the layout and physical systems in place. For example, you don’t want to tell students that part of their morning routine is to turn in their homework if there’s no spot in the classroom for them to put their work. Otherwise, you’ll have 25 students shoving papers in your face when they walk in the door.
The goal is to encourage student independence so your classroom runs smoothly even if you aren’t in the room. You’ll want to make sure students are able to access all of the materials they need without your being the gatekeeper of the pencils, books, paper, etc. Having everything in its place allows you to delegate tasks to your students, empowering them and saving you time. Why do something yourself when you can teach the students to do it for you, right?
The goal is to have your classroom organized so that when the kids get there, you can start teaching the procedures right away.
Organizing Near the Door

Cubbies: You know students come to school with all sorts of things from home, including jackets, backpacks, rain/snow boots, lunch boxes, balls for recess, etc. Assigning a spot in your classroom for each student to put their belongings will not only keep your classroom organized, but also make students feel like they have a place of their own in the classroom. Put students’ names on their cubbies so that they will be easy to find on the first day. If you don’t have built-in cubbies in your room, consider getting some Command hooks or cheap plastic crates.
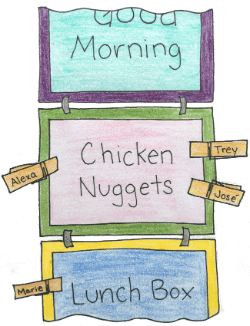
Attendance/lunch choice: Taking attendance and lunch choice yourself is not an effective use of your limited morning time. As we said earlier, if your students can do it, they should. Somewhere near the door (if possible), create an attendance and lunch choice station. One way to do this is to use a simple clip chart. The top of the chart will say “good morning,” and you’ll clip a clothespin for each child there at the start of each day. The rest of the chart will have spots for students to choose their lunch option for the day. Whichever clothespins are left on “good morning” indicate students who are absent. Laminate each section of the clip chart, and connect the sections with a hole punch and binder hooks. As another option, you could create a similar system on a cookie sheet with magnets for each student.
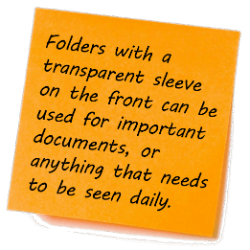
Turn in “take-home” folders: Give each student a folder to use for all of their “take-home” documents. These documents can include homework, permission slips, notes home, newsletters, and anything else that parents may need to see. Parents can also use this as a reliable way to deliver notes back to school, such as changes in transportation or early dismissal. On a small table, have three trays (stackable paper trays work well): homework, parent notes, and permission slips. You can also customize these trays for things you commonly send home or receive from parents. If you’re putting this on your supply list, ask for the specific folder that works well for you (e.g., all blue with prongs, yellow double pocket folder).
Organizing the Front of Your Classroom
Rules poster: Display the classroom rules prominently in the front of the room. You’ll want to refer to them often in the first couple of weeks of school and as needed throughout the year.
Daily schedule: Write out the most common components of your daily schedule on sentence strips (e.g., math, science, art, PE) and use a pocket chart to display them. You can easily rearrange and swap out the sentence strips. Students will know exactly what is happening each day – what special they’re going to, what time recess is, etc. – and you will save yourself from answering a million questions about the schedule.

Morning and end-of-day procedures: Post your morning and afternoon procedures so students may refer to them as a daily checklist.
Homework/Other assignments: Write homework and other assignments in the same place daily so that students know where to look for them and can copy them down as part of your routine.
Setting up Desks and Student Seating
- Decide how you would like to arrange students’ desks for the majority of activities. Some schools have preferences for this, so check with your administration. Remember that none of the students should have their backs to the board. If you’re going to arrange the desks in groups, angle them so that the desks are perpendicular to the front of the room. Arranging desks in groups can foster cooperation and communication among students, and the expectations you implement and reinforce will limit/prevent disruptions from chatty students. Assign seats from the first day of school, and make adjustments in the first week as you get to know your students.
- Label your desk groups so that you can easily call on them for things such as lining up. You can use different colors, college names, animals, or something else that works for the theme in your classroom.
- For younger students who will spend a lot of time on the carpet, create a spot for each child to help teach them the concept of personal space. Some classroom rugs are nicely squared off with different colors. If yours isn’t, don’t feel like you have to go buy an expensive new carpet. You can use cheap placemats from the dollar store, or fabric or carpet remnants to create personal squares for each student to sit on.
Additional Classroom Orginization

Cool down corner: Inevitably, an upset student will need a safe place in the classroom to cool down and take a break. Establish a corner of the room with a beanbag chair or pillow and a poster of emotion regulation strategies. Students can practice identifying emotions and managing their feelings in different situations in the interactive online game, Zoo U.
Behavior: We’ll chat more about the different options for encouraging positive behavior later on. If you choose an option that tracks behavior publicly, like a clip chart, you’ll want to have that set up before you introduce the system to your students. Even if you aren’t going to track behavior publicly, you’ll probably want to display posters or anchor charts reminding students of your behavior system (which is different from your rules poster).

Classroom jobs: Create an area to display and assign classroom jobs. An easy way to do this is to take a picture of each student in the first week of school and attach a magnet to the back of the photo. Arrange the classroom jobs on a magnet board, and easily swap the photos around when students change jobs.
Display some personal items: Displaying a few personal photographs, your college banner, or other trinkets on your desk helps to build a relationship with your students. You don’t have to (and shouldn’t) tell your students everything about you. But knowing you as a person, rather than just a teacher, will help students feel comfortable sharing their own home life with you.
Classroom Rules and Procedures
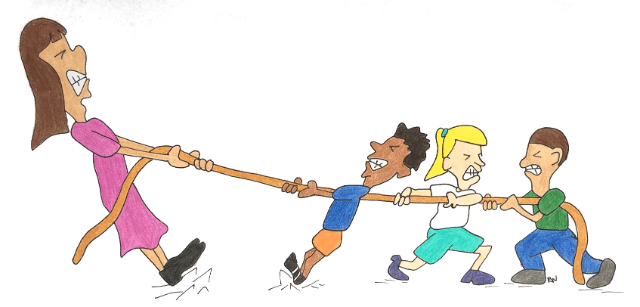
Every school day isn’t perfect, even for the best teachers; kids are human and will have bad days. But, you can work toward whatever your ideal classroom looks like by establishing clear classroom rules and procedures from the first day of school.
When students know what is expected of them, and these expectations are reinforced daily, there is little room for power struggles between teacher and student, or complaints from parents.
Classroom Rules

Imagine a basketball game in which none of the players know the rules. The referees would blow the whistle constantly, admonishing players for breaking rules they didn’t know existed. How frustrating would this game be for both the players and the refs, and for the fans in the bleachers? It would be chaos.
In your classroom, you are the referee, your students are the players, and the fans are parents and guardians. If your students don’t know the rules, your classroom will be just as chaotic. So, set your classroom rules from the first day of school, and make sure they’re understood by everyone so there will be no surprises or room for arguments from students and parents.
Less is More

Create a few straightforward yet inclusive rules for your classroom. Too many rules will be hard for students to remember and follow, so try to keep it to five or six. That means the rules need to be broad enough to encompass all of the behaviors you want to avoid, while being clear enough that students understand what behavior is expected. The most effective rules tell students what they should do, not what they shouldn’t do. For example, “Keep hands and feet to yourself” is preferable to “No hitting or kicking.”
We just gave you a lot of rules for writing classroom rules! You can use our posters or refer to it for creating your own. Display your rules poster prominently in the front of the classroom so that you and your students may reference it often.
“Something I do in my classroom that works great is to write the rules with my students,” explains Katy Jaeger, a first-grade teacher in Colorado. “We come up with them together, and then everyone signs their name so we all agree. I also call them “Classroom Expectations” as opposed to “rules” to increase positivity.” You can steer your students toward coming up with the rules you’ve already written, and unveil your poster the next day.
Communicate with Parents

Discuss the classroom rules with parents at open house, and send them home on the first day of school. Explain that your students will contribute to the rules on the first day, and invite parents to ask clarifying questions or contribute their thoughts as well. Now that you have their buy-in, if you do need to call home, parents will understand what rule was broken and why this was a rule in the first place. This is your first step in developing a partnership with your students’ parents.
If you have time to send mailings home before the start of school, this is a good opportunity to begin building a positive relationship with your students with a personal letter. Students are often nervous to start a new school year, and this will get them excited to join your classroom. And what child (or adult!) doesn’t love getting a letter in the mail?
Be Consistent
Reinforce classroom rules consistently with all students, even in seemingly minor infractions. If students notice that a classmate doesn’t receive a warning or consequence for breaking one of the rules, they’ll develop bad habits that will be hard to break. And you’ll get a lot of “Why are you picking on me?” responses from students. We’ll cover more on rewards and consequences in the next section.
Classroom Procedures
Procedures are different from rules and are just as integral to a well-managed classroom. If your classroom rules are like the rules of a basketball game, your procedures are the plays, the strategies of the coach and team to keep the game organized in order to win. The coach foresees all of the upcoming obstacles in a game, and designs plays to overcome them. He doesn’t need to give specific instructions during a game, only the name of the play, and each player knows exactly where to be on the court and what to do.

Plays are not learned one day and then used successfully in a game the next. The coach spends time teaching the play and making sure the players understand, and then the players practice over and over again until the play is routine. If a play doesn’t end up working in a game, the coach will make changes and start the practice again.
When working on classroom procedures with your students, you are no longer the referee, you are the coach. You need to foresee all of the different situations that will come up daily in your classroom, and design procedures that will tell your students how to navigate them. Your students will not internalize your procedures with one explanation. You need to spend plenty of time in the first couple of weeks of school explaining the procedures, modeling them, and putting them into practice. If a procedure doesn’t end up working, don’t be afraid to make the necessary changes and practice again.
Teaching Procedures
When teaching procedures, you can use a similar strategy to teaching academic lessons: I do, We do, You do.
I do:

First, explain the procedure while modeling it yourself. Use explicit directions that don’t leave any room for interpretation or student failure. Have you ever done the writing exercise that asks you to give instructions for making a PB&J? You might start with the first step of “spread the peanut butter on the bread.” But if I’m totally unfamiliar with the concept, where do I get the bread? How do I open the jar? What do I use to spread the peanut butter – my fingers, a spoon? You’ve probably made a PB&J so many times you could make one in your sleep, so it’s more difficult to break down everything that goes into making the sandwich, and things such as using a knife seem obvious. It’s the same with a procedure such as lining up to leave the classroom. Children need all of the tiny, seemingly obvious steps to set them up for success.
If you want them to end up standing quietly in line at the door, you might explain the procedure like this:
- When I call your table group, you will silently stand up.
- Without talking, push your chair in gently, trying your best not to have it make noise on the floor.
- Walk slowly and silently to the door.
- Stand in a single-file line, keeping your hands to yourself.
- Wait silently and patiently for the rest of the class to line up.
After you explain this procedure, model it for your students while explaining it a second time. Sit down at one of the student desks and go through the movements. Next, check for understanding by asking if anyone can explain the procedure. Call on a student and have her re-explain the procedure to the class. Make any corrections needed.
We do:
Have a couple of students demonstrate the procedure while you narrate. “Billy is standing up silently. Sofia pushed in her chair as gently as she could. Daryl is walking silently to the door. Aaliyah is standing behind her three classmates with her hands to herself. Billy, Sofia, Daryl, and Aaliyah are all standing silently and patiently waiting for the rest of the class to line up.”
You do:
Call on the rest of the table groups to practice this procedure, acknowledging students who are following it correctly. If a student misses any of the steps, have him go back to the previous step and gently remind him of the procedure. “Charlie, remember we are pushing our chairs in gently, so they don’t scrape the floor or bang our desks.” Continue practicing until the whole class can complete the procedure together.
The explicit directions may feel a little silly and unnatural when you first start, but the kids need to know exactly what you expect of them. There are a lot of procedures you will teach in the first weeks of school, and as new situations and activities arise throughout the year. We’ll go into detail on a few examples below.
Common Procedures

Emergency procedures (fire drill, tornado drill, lockdown, etc.):
Teach these procedures first. You never know when an emergency will happen, and your students will need to behave calmly and safely.
Your school may have specific guidelines for these types of drills, so consult with other teachers and administration. Most schools are required to have a fire drill once a month. School-wide lockdown drills happen less frequently (sometimes only once a school year) but are just as important, so consider having your own drill with your students once a month as well.
“Leave now” codeword:

There could be an emergency situation in which you would want your class to leave the room quickly while you stay behind. This could be due to a medical emergency, such as a student having a seizure, or a student becoming violent/dangerous to others. There won’t be time for explicit directions in these situations, so you’ll need to establish a codeword and procedure. An example of a codeword is “hot dog.” When students hear you say the codeword, they should quickly pick up what they are working on (scooping it up in their hands like they’re holding a hot dog) and silently leave the room. Designate a safe place for them to go, ideally another classroom, or the hallway if necessary. Assign one student to tell the teacher in the other classroom the situation so she can call for help, while the rest of the students sit down and continue working. Once you have practiced this procedure a couple of times, begin to practice it about once a month without warning students, like a fire or lockdown drill.
Morning Routine:
You can start off on the right foot each day by establishing a morning routine. What are the most important things you want students to do before instruction begins to prepare for a successful day? You’ll have a lot going on in the mornings, so students will need to be able to come in and get settled independently.

Morning Routine Example
- Enter classroom quietly
- Mark attendance and lunch choice
- Turn in homework in designated homework spot
- Put jacket/backpack/lunchbox and anything else in cubby
- Make sure you have sharpened pencils and any other materials needed for the day
- Read today’s schedule
- Complete your Do Now (explained below)

Attendance/Lunch choice:
Students will take their own attendance and make their lunch choice on the same clip chart (see Part I of this plan for instructions on how to make and use a clip chart). Instruct students to move their clip from “Good Morning” to their lunch choice. Some schools offer more than one hot lunch choice. If you have laminated your clip chart, you can write in the new choice each day. For the first few weeks of school while students are practicing this procedure, double-check the attendance before you send it to the office. If any students forgot this step in their morning routine, have them go back and do it. Once students have gotten this procedure down, you’ll only need to do a quick scan each morning.


Turning in homework and notes:
After students have made their lunch choice, they should take out their Take Home Folder and put their homework and any notes from home in their corresponding trays. For K-2 students, you could have them turn in their entire folder so that you can look for homework and notes yourself.

Do Now:
Once students have completed the rest of their tasks in the morning routine, you’ll want them to have an activity to start the learning for the day. A simple way to do this is to have a similar “Do Now” each morning. For example, each morning you could put a sentence on the smartboard with grammatical errors and have students correct them. Younger students could practice their letters or handwriting. If, later in the year, your students are struggling with another fundamental, you can switch the Do Now.
End-of-Day Routine:
At the end of the school day, both you and your students will be tired and ready to go home. Keep an awesome school day from devolving into chaos with an established routine for packing up to go home.
End-of-Day Routine Example
- Make sure you have all materials needed for homework
- Pack all belongings in backpack
- Pick up trash around your desk
- Stack chair on desk (ask your school’s custodian what would be most helpful)
- Line up quietly for dismissal
Getting attention/Listening to a speaker:
Throughout the day, there will be times when your students are working independently and you need to call their attention. If you don’t practice a procedure for this from the beginning, you may find yourself flicking the light switch on and off while students yell and giggle, or trying to shout above the noise. (This is especially no fun when another adult is in the room.) You’ll also need to establish how you want your students to get ready to listen while you, a classmate, or anyone else is speaking.
A call and response is a fun way to get your students’ attention. You’ll say a phrase, students will respond with the corresponding phrase or action, and you’ll repeat the process until you have everyone’s attention. One common example is “If you can hear me, clap once; if you can hear me, clap twice”; and so on, because the clapping helps get students’ attention. There are tons of examples out there, including this great list compiled by National Board Certified Teacher Angela Watson.
To connect your call and response to your active listening pose (explained next), here’s an example:
“Whooooo’s ready? … Hoot Hoot”
or
“Whooooo’s ready? … to make wise choices?”

When you call the whole class’ attention, it’s because you have something to say, whether it’s directions, a new lesson, or a visitor in the room. Students need to know how you want them to behave once you have their attention, and how to show that they are listening. In comes the Active Listening Pose. Active Listening is “mak[ing] a conscious effort to hear not only the words that another person is saying but, more importantly, try[ing] to understand the complete message being sent.”
Note that this active listening pose does not focus on where students’ body parts are. Some students may actually listen better with a fidget toy in their hands, or while they’re standing or bouncing on an exercise ball. If you’ve made these accommodations for some students in your classroom, you don’t want your active listening pose to prescribe that all students have their hands folded, as it will cause confusion and arguments about fairness among your students.
However, if you’re in a situation where students need to sit a certain way because they’re in tight quarters, such as carpet time or an assembly, you might introduce an additional pose for that particular situation. A good call and response for carpet time is “Criss-cross applesauce … spoons in the bowl,” reminding students to sit with their legs crossed and hands in their laps.
Additional Classroom Procedures
Voice levels:
When students are supposed to talk, whether giving a presentation, working with a group or partner, or answering a question, they need to know your expectation for how loud to speak. Introduce the different acceptable voice levels at the beginning of the year, and model what each of them sounds like. Then, throughout the year, whenever you are about to start an activity in which students will talk, tell them which voice level they should use.
Classroom Jobs:
Once your whole class has learned their procedures, assigning classroom jobs can save you time and transfer ownership of the classroom to students. As with any of your procedures, be sure to teach, model, and practice the classroom jobs with students. When it’s time to switch jobs, have the previous student teach the new job holder the ropes. For upper elementary students, consider switching jobs each month, and to increase accountability, have students fill out an application to choose their new job.
Here is a list of classroom jobs and their responsibilities from Scholastic.
Use a timer:

It’s always going to seem like there’s not enough time in the day. Students, especially those who may come to you below grade level, need all the time you can give them to learn. Implementing these procedures will cut down on wasted time, but you also need to foster a sense of urgency in your students that any wasted minute is taking away from their learning time. We walk quickly, but safely, in the hallway to our next destination because we need as much time as possible to learn. We put away our ELA notebooks and transition to math as quickly as possible so we don’t lose any math time. Using a timer will help hold both you and your students accountable to the schedule.
You can use e.ggtimer.com to display a timer on the smartboard. This clock-like timer is also a great visual representation for students who can’t tell time yet. In the hallways, you can use your watch or smartphone.
Throughout the day:
These are just a few examples of important procedures, but you’ll want to implement procedures for every aspect of the day. “Whether it’s lining up for recess, sharpening a pencil, or transitioning from one activity to the next, having classroom procedures and routines is extremely important. There is honestly nothing better than having your classroom run like a well-oiled machine,” says Kristine Nannini, an elementary school teacher and blogger. Nannini offers a checklist of 100+ procedures on her Teachers Pay Teachers store, including “What to do if someone enters our class with a birthday treat?” and “What do you look like at an assembly?”
Classroom Management Strategies
“I’ve worked in dozens of schools as a school change coach, and I have seen firsthand that the very best schools teach children how to regulate their own behavior rather than relying on adults to tell them if they are “good” or “bad”…It’s a lot more fun and satisfying working in a school with students who take that responsibility rather than the adults making judgments and always being “in charge.” Why should we be responsible for their behavior? Let’s teach them how to do it!”
Mike Galvin – Senior consultant at Focused Leadership Solutions
Ideally, you will create a classroom culture in which students behave because they want to make good choices, rather than to earn rewards or to avoid negative consequences. But, you can’t expect intrinsic motivation to happen overnight. You will need a thoughtful set of classroom management strategies.
Just as you spend time practicing procedures over and over again, you also have to spend time positively reinforcing good behavior and negatively reinforcing bad behavior until students internalize the message. As Galvin says, we have to take the time to “teach them how to do it.”
Teaching Students to Take Responsibility
In Part II, we mentioned transferring responsibility to your students (access to materials, classroom jobs, taking attendance, etc.). Similarly, we can put students in charge of their own behavior with the right system. Students should be able to recognize appropriate and inappropriate behavior in themselves and others, and adjust accordingly.
Bonus: We have a great lesson, Would You Rather Questions for Kids, to help you discuss the tradeoffs involved in making different choices.
In her blog post, Becky discusses the Raise Responsibility system she uses, based on Marvin Marshall’s book, Discipline without Stress, Punishments, or Rewards. This system gives students a framework to think critically about their behavior, deciding for themselves if it needs to change. There is also a nuanced distinction between doing something to look good or be rewarded, and doing something simply because it is right.
The Raise Responsibility model separates behaviors into the following zones or levels:
D – Democracy
- Being kind and helping others

- Doing something because it’s the right thing to do, even if no one is watching
C – Conformity
- Listening and following directions
- Working well with others
- Doing something to look good, be rewarded, or avoid trouble
B – Bullying/Bossing
- Name calling
- Bothering or bossing others
- Breaking classroom rules
- Must be bossed to behave
A – Anarchy
- Loss of control
- Actions that could hurt yourself or others
- Running, hitting, or kicking
The A and B levels encompass bad choices that need correction. The C level includes good behavior, but the student is extrinsically motivated by classroom rewards. The goal is for students to achieve D level, meaning they’re intrinsically motivated to behave well. Display these levels on posters in your classroom.
If a student continues to misbehave after one warning about their level, Becky suggests they fill out a behavior reflection think sheet. She also gives each student a personal level ring so that they can all do a “level check” if needed. You can download these personal level cards for free from Becky’s Teachers Pay Teachers store.
Miss At, another blogger and teacher using the Raise Responsibility model, has students choose their consequence after finishing their reflection. This reinforces the idea of students regulating their own behavior. Miss At suggests providing students with some acceptable consequences as a starting point so that the consequence they choose is still one you find appropriate for their behavior.
Clip Charts
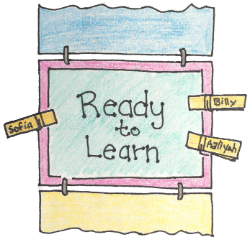
Another popular model for reinforcing and tracking positive and negative behavior is the clip chart. Each student in your class would have a clothespin with his or her name on it that would start in the middle of the chart each day. Students earn the opportunity to move up the chart with good behavior choices, or move down the chart with poor behavior choices. Students start each day with a clean slate with their clip reset to the middle.
Former teacher Rick Morris has a helpful e-book explaining how to create and introduce a clip chart system in your classroom. He says, “Any student who has been asked to move his clothespin down a level or two … has the opportunity to improve his behavior and see his clothespin rise to a better level … The thought that a child is offered a chance at redemption is not only a powerful motivator for the student, it also enables the teacher to act on problem behavior and not just talk about it.”
When introducing the chart system, make it clear to students what to expect from each level of the chart. Set the rewards for the top parts of the chart or consequences for the bottom levels from the beginning so you are not making these decisions based on your emotions.
As with the Raise Responsibility System, you could also use a reflection sheet or have students choose their own consequence when they reach a certain level on the chart.
ClassDojo
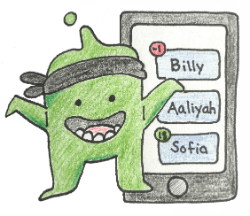
ClassDojo is a free, electronic way to manage behavior in your classroom. Teachers input their students’ names via the app or a computer, and each student gets their own monster avatar. You can customize which skills are most important to your classroom, such as cooperation and impulse control. Throughout the day, you can award dojo points to individual students for displaying those skills, and you can also award whole-class points. Students will hear a “ding” noise when you award a point. You can also take away points when students are not making good choices. Some teachers display the points breakdown to the whole class, while others don’t – that’s up to you!
ClassDojo also has features to connect with parents. According to their site, “Parents can see their child’s feedback from their own device at home. Plus, [teachers] can also easily share with parents:
- Photos and videos of students working hard in class
- Ideas for how they can help at home
- Important announcements and reminders”
Sarah, a special education teacher, uses ClassDojo in conjunction with a clip chart. “I…can’t assume that all parents will log into ClassDojo, and I am a big believer in strong home-school communication, especially when it comes to behavior. So I came up with a system to incorporate ClassDojo with my color chart so we could have all hands on deck,” Sarah explains on her blog.
Classroom Rewards

While we want to teach students to do the right thing without expecting a reward, a little recognition when students are making good choices goes a long way. Even as adults, an unexpected “job well done” or shout-out at a staff meeting gives us a little boost. Positive behavior reinforcement can be an important part of your school’s culture, especially if your school uses PBIS (Positive Behavior Intervention Supports). Now that doesn’t mean you have to hand out candy or some other trinket to students every time they follow a rule. Below are some examples of rewards and acknowledgments that you can use to reinforce positive behaviors with individual students or the whole class:
Classroom Rewards for All Students

When a majority of the class has been exceptional (D level for an extended period, top levels on the clip chart, certain number of dojo points, etc.):
- Cheers and energizers are free celebrations that also get students up and moving and get their wiggles out. You can write the titles on a popsicle stick and choose one from a can each time.
- Put a pom-pom in a jar. If the jar gets filled to a certain point by Friday, give the class a special reward, such as a five-minute dance party.
- Give whole-class points on ClassDojo.
Individual
- Call home on a regular basis to praise students so when you need to call home with a negative, you already have a relationship with the parents. Parents may not be used to getting positive calls and will be delighted.
- If you know you won’t have a chance to call home that night, send a note. Consider getting a notepad with carbon copies so you can keep one for your records.
- Send home behavior updates via the ClassDojo app.
- For younger students, consider having a behavior calendar that gets sent home every day. On each day, you can mark which level of your particular behavior system a student ended the day on, or was on the most.
- Have students be on the lookout for good behavior to give shout-outs to their classmates. Put shout out slips (available for free below) in an accessible part of your classroom, along with a spot for students to submit them. You can choose to read a couple or all of them each day to encourage students.
- Examples of individual rewards:
- Homework pass
- Sit next to a friend for the day
- Have your shoes off while working
- Lunch with the teacher
- Pick a classroom job
- Anything else you’ve noticed your students like
Consequences
While you’ll put in every effort to create a positive classroom culture, consequences will still be necessary. In the same way that we want students to learn to do the right thing simply because it’s right, we want students to avoid poor choices, not because they are afraid of getting caught, but because they know they are wrong. Be clear and consistent about what behavior will lead to what consequence.
- Call parents when necessary. If you’ve already built a strong relationship with positive calls, parents will be more supportive and willing to help correct a negative behavior.
- Send copies of reflection sheets home to parents.
- Send home behavior updates via the ClassDojo app.
- For younger students, consider having a behavior calendar that gets sent home every day. On each day, you can mark which level of your particular behavior system a student ended the day on, or was on the most.
- For severe behavior, send to office/write referral.
- Examples of individual consequences:
- Lose five minutes of recess
- Loss of classroom job
- Loss of choice in a certain activity
- Sit by yourself for the day
- Silent lunch
- Loss of participation in a whole class reward
- Take away a privilege your individual students find valuable
“Stay consistent, stay consistent, stay consistent, when giving rewards and especially consequences!” says Alexa Baird, a 4th-grade teacher in North Carolina. “Even the best behaved kid can act out if given the opportunity. Be strong with rewards and consequences for the first two to three months, and the rest of the year will be smooth sailing.”
When Things Aren’t Working:
There may come a time when you lose control of your classroom. These plans and systems are unfortunately not foolproof, and there could be a day when the full moon, Halloween, and three kids’ birthdays perfectly align. “When you are in an emergency situation and you don’t know what else to do to get you through the rest of your class period, pull out a notebook and start writing,” says Jennifer Gonzalez of Cult of Pedagogy. In one of her videos, Gonzalez explains that whenever she did this in her classroom, her students calmed down within a minute. “It doesn’t matter what you’re writing,” she says, “but the students are caught off guard and start to focus on you.” It also works as an exercise to calm the teacher down in this stressful situation. “It’s a self-soothing strategy, a form of meditation, and what it can do is help the teacher get into a calmer state of mind so he or she can make a smart decision, rather than a knee-jerk one,” says Gonzalez.
To use the notebook in your classroom management plan apart from an emergency strategy, see Part 2 of Gonzalez’s video.
And, lastly, make sure you practice self-care! It’s essential for long-term success in the classroom.
Effective Classroom Management with SEL
“If you focus instruction only on what to do or not to do in a given circumstance, the child will be left at a loss when he faces a situation that was not explicitly taught … We need to help children understand not only how to behave appropriately, but also why behaving in an appropriate manner will be good for them.”
Melissa DeRosier, PhD – Clinical Psychologist
In order to succeed in the classroom and in life, students need to be able to evaluate the pros and cons of different behaviors and understand why the one they choose would work best. And this doesn’t come from robotic following of rules and procedures.

Instead students must develop appropriate social and emotional skills. According to the Collaborative for Academic, Social, and Emotional Learning (CASEL):
“Social and emotional learning (SEL) is the process through which children and adults acquire and effectively apply the knowledge, attitudes, and skills necessary to understand and manage emotions, set and achieve positive goals, feel and show empathy for others, establish and maintain positive relationships, and make responsible decisions.”
Just like with your rules and procedures, the key is to introduce, model, and practice social and emotional skills and behaviors with your students – You can use our free SEL lessons to help. Here are a few examples:

Yazmin Chavira, a KIPP alumna and teacher, says, “Once you have one concrete language that everyone is using – teachers, parents, students – that they see it on the walls, their teachers are using it every day in class, that makes it a lot more salient for them.”
And KIPP teacher, Alaina Harper explains how a focus on character impacts reinforcement of behavior in her classroom: “Instead of it being ‘I have a feeling about what you’re doing,’ it’s ‘I have this behavior that you’re doing which highlights this particular strength.’ And so it takes a lot of the personal out of it. So it’s no longer ‘Ms. Harper doesn’t like me’ or ‘Ms. Harper is unfair to me.’ And because of that, they’re more open to being able to address it. Because it’s not that I’m gonna to like you better, it’s that you’re going to be better.”
How do you provide students the opportunity to practice these social and emotional skills? Our online SEL interventions are a great way for students to practice and improve in common situations they would experience at school.